Slide Deck Template Tutorial
September, 01 2022
Other posts:
Enhancing Team Dynamics for Effective Group Decision-Making with LMS Integration
Organizations increasingly rely on collaborative efforts to solve complex problems, innovate, and adapt to change, but how do we ensure that collaboration is happening.
Maximizing Small Business Potential with Training Technology
Training technologies can push small businesses ahead of their competitors, but what are the factors that go into choosing the right technology?
Unlocking Employee Potential: The Transformative Benefits of an Interactive Learning Management System (LMS)
Interactive training allows for unlocking employee potential, but how is it done?
Building a Robust Sales Pipeline with Training
Every organization wants a streamlined sales pipeline, but building one requires a series of interlocking activities with one of the most important being training.
Strategies for Adapting In-Person Training to Online Platforms
Online training is one of the most flexible ways of delivering training across organizations, but how do you even begin to adapt in-person training into online?
Slide Decks afford importing PowerPoints, but Slide Decks can still be made without them. This tutorial will cover how to make Slide Decks with adaptive templates.
Let’s look at how to create a Slide Deck using the CoreAchieve Learning Management System.
To create a Slide Deck using one of the templates, first create a module. Then in the pop-up give section name, give it the section type of Slide Deck, give it a parent section, and press save.
Figure 1: New section creation pop-up
Once that is done, the name of the section will appear under the navigator. Click on it and to the right of the navigator is the Slide Deck editing window.
To being creating your Slide Deck, click on the “Add Slide” button. In the drop-down menu, there are five different options—each with a descriptive name. Choose whichever one suits your plan. Note: the style of the slides (besides “Empty slide”) changes with your logo and brand colors!
After you have selected a layout for your slide, a slide with place holder text will appear. Any item surrounded by an orange dotted line is editable. Simply click within the bounds and an editing menu will appear.
Figure 2: Creating silde and editing header from template
Note: The editing window will appear different and have different options depending on predefined section it originated from. For example, the “Image…” section only has options pertaining to images. However, in text editors you can use whatever content you want.
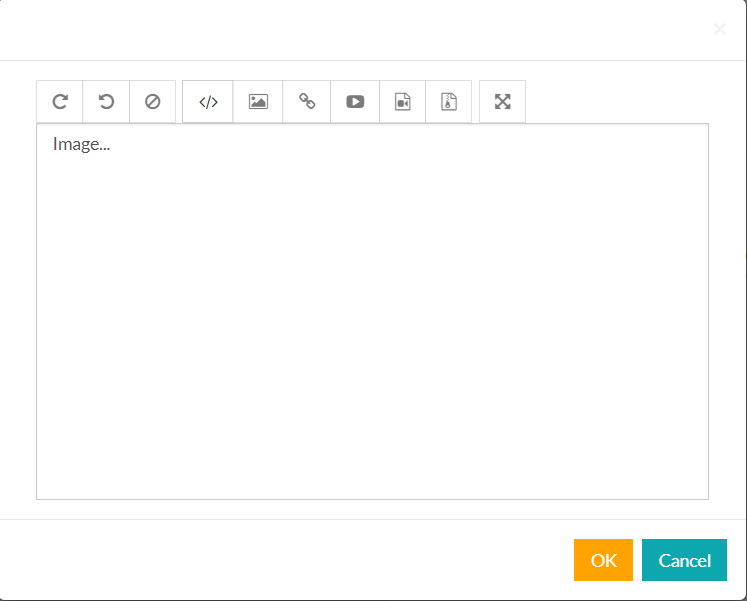
Figure 3: Image editor pop-up
Once you have your content set, the next thing to do is add optional audio or a slide delay at the bottom of the slide preview. Slide delay determines how long a learner must stay on that slide before moving to the next slide. Note: if you don’t want a slide delay, just enter 0.
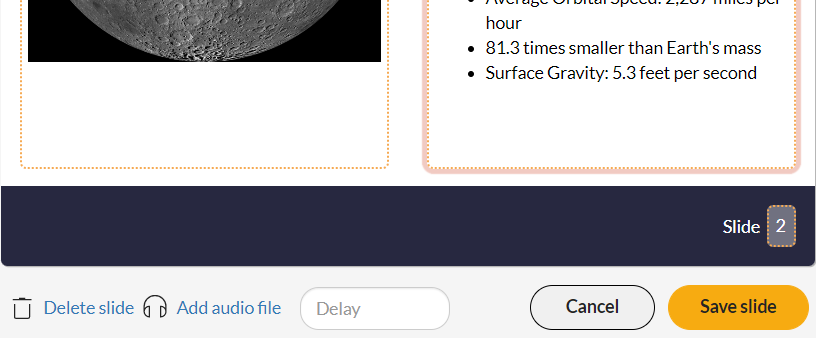
Figure 4: Delete, add audio file, add delay, and save slide controls
All that’s left to do is save your slide and begin creating the next one. If you need to reorder the slides, simply just drag and drop them into their desired location. Afterwards, just press “Update slide ##” and CoreAchieve will automatically update the slide numbers.
Figure 5: Switching slide order and updating numbers
Slide Decks are a remarkably adaptable addition to the many tools offered by CoreAchieve. The slides will automatically update with branding and positioning. Click here for a video on Slide Decks.
Ready to get started?
Train more
people effectively
Use CoreAchieve to create and manage eLearning content and validate completion.
*This link is intended only for demos of the CoreAchieve platform, do not contact us with unsolicited offers.
Proud of what you made? Sell it
By supporting eCommerce, CoreAchieve allows you to profit off all of your courses even more.

Leave comment: